Faced vs. Unfaced Batt Insulation: What's the Deal?
Alright, so you're thinking about batt insulation for your place here in Mesa. Maybe it's for the attic, walls, or even a crawl space. You'll pretty quickly run into two main kinds: faced and unfaced. It's really not as complicated as it sounds, but knowing the difference can definitely save you some headaches and money down the road. I've seen a ton of homes, from the older ranch styles over in Dobson Ranch to the brand-new builds out in Eastmark, and getting these basics straight is super important.
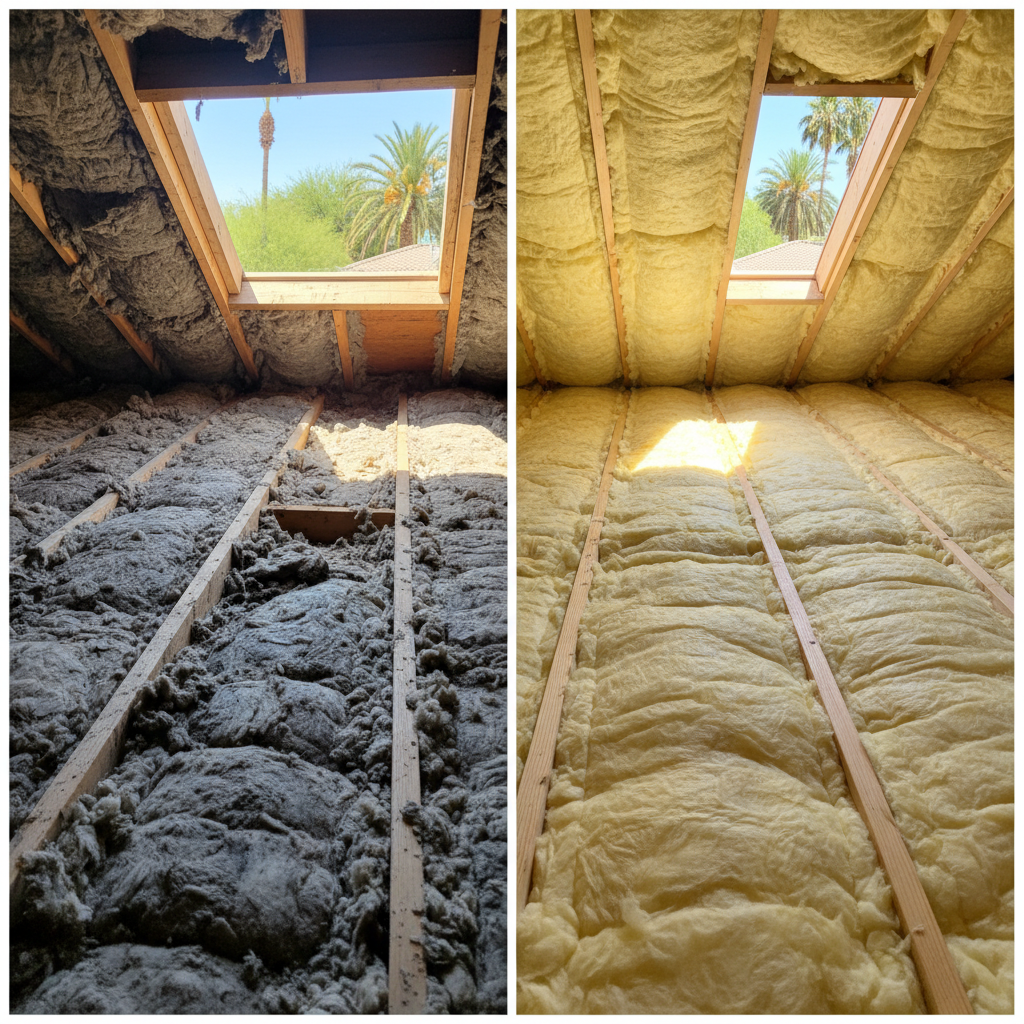
First off, what are we even talking about? Batt insulation means those pre-cut rolls or sheets, usually fiberglass or mineral wool. They're designed to fit snugly between studs, joists, or rafters. The 'face' part? That's a paper or foil backing that's stuck to one side of the batt. Unfaced, well, that's just the insulation itself, no backing at all.
The Lowdown on Faced Batt Insulation
Faced batt insulation usually comes with a kraft paper or foil facing. This facing does a couple of big jobs, and one of them is pretty crucial for us living in the Arizona desert. Its main role is as a vapor barrier. In colder places, this barrier helps stop moisture from the warm, humid inside of a house from sneaking into the wall cavities and condensing. That condensation can lead to mold and rot, which nobody wants.
Now, here in Mesa, our climate is a whole different ballgame. We're hot and dry most of the year. For us, you'll generally find the vapor barrier on faced insulation installed facing the conditioned (cooler) side of the wall or ceiling. This helps keep outside moisture (hello, monsoon season!) from getting into the insulation. It also really helps cut down on air movement through the insulation itself, which actually gives its R-value a little boost.
Another neat thing the facing does is make installation a bit easier. It gives the batt some stiffness, so it holds its shape better and won't slump as much. Plus, the paper facing often has these little flanges you can staple to the studs or joists, holding it firmly in place. This can be a real time-saver, especially if you're tackling a DIY project, right?
Cost, Durability, and Appearance with Faced Batts
- Cost: Faced batts are usually a little pricier than unfaced ones. You're paying for that extra layer and the vapor barrier features.
- Durability: The facing itself adds a bit of structure, helping the batt keep its shape. But, that paper facing can tear if you're not careful, and it's also flammable, which is why it typically gets covered by drywall.
- Appearance: You won't really see it once it's installed and covered up, but during the installation, it looks pretty neat and uniform with that paper or foil facing.
Unfaced Batt Insulation: Simple and Versatile
Unfaced batt insulation is just the raw insulation material. No paper, no foil—just the fluffy stuff. It's often used when you don't need a vapor barrier, or when another material, like a separate plastic sheet, is already providing one. It's also the go-to choice when you need to layer insulation, like adding a second layer in an attic right over existing insulation.
One of the big perks of unfaced batts is how flexible they are. Without the facing, you can easily cut them and friction-fit them into odd-shaped spaces. You don't have to mess with stapling flanges, which can be a real pain in tight spots. They're also less flammable than faced batts because they don't have that paper backing, which can be a definite plus for certain applications or building codes.
If you're insulating an interior wall between two conditioned spaces, say between two bedrooms, unfaced batts are usually the way to go. You don't need a vapor barrier there, and the main goal is typically sound dampening and keeping temperatures separate.
Cost, Durability, and Appearance with Unfaced Batts
- Cost: Generally, unfaced batts are a bit cheaper per square foot than faced batts since there's no extra material for the facing.
- Durability: They hold up well in terms of thermal performance, but without the facing, they can be a bit floppier and more likely to slump if you don't install and support them correctly. You really have to make sure they're cut just right for that friction fit.
- Appearance: Again, you won't see it once it's hidden. But during installation, it's simply the raw, fibrous material.
My Recommendation for Mesa Homeowners
For most exterior walls and ceilings here in Mesa, especially in new builds or big renovations where you're down to the studs, I usually suggest faced batt insulation with the facing installed towards the interior (conditioned) side of the home. That vapor barrier is a smart move for our climate; it helps manage moisture and actually improves overall thermal performance by cutting down on air infiltration. It's a small extra cost that really pays off.
However, if you're adding a second layer of insulation in an attic over existing batts, or if you're insulating interior walls just for sound control, unfaced batts are perfect. You definitely don't want two vapor barriers in a wall cavity, as that can actually trap moisture. So, layering unfaced over existing faced insulation in an attic is exactly the right approach.
The main thing is to understand what each type is for and use it correctly for your specific situation. Insulation, whether faced or unfaced, just won't do its job if it's installed wrong. If you're not sure, or if you've got a tricky spot, it's always best to call in the pros. We've been doing this for years at Spray Foam Pros of Mesa, and believe me, we've seen it all. Getting it right the first time saves you money and keeps your home comfortable, even when it's 115 degrees outside.