Alright, let's talk attic insulation. Here in Mesa, with our summers that feel like a blast furnace, a properly insulated attic isn't just a nice-to-have; it's absolutely essential. It keeps your AC from running non-stop and your energy bills from going through the roof. But when you're looking at that dusty, dark space, you might wonder, "Can I do this myself, or should I call someone?"
Before You Start: Getting Your Attic Ready
Before you even think about adding more insulation, you've got some prep work to do. This is crucial, and honestly, a lot of it you can absolutely handle yourself. Don't skip these steps, or you'll just be wasting time and money.
- Clear it out: Get rid of any old junk, boxes, or anything else you've stored up there. You need clear access to the entire attic floor.
- Seal those leaks: This is probably the most important step, seriously. Insulation won't do its job if air is just blowing right through gaps. Look for any penetrations in your ceiling – light fixtures, electrical boxes, plumbing vents, chimney chases, and especially the attic hatch itself. Use caulk for smaller gaps and expanding foam for bigger ones. Don't forget to seal around ductwork where it enters the ceiling. This air sealing work is often overlooked, but it's a huge energy saver.
- Check for moisture: Are there any signs of water stains on the wood or old insulation? You need to find and fix any roof leaks before you add new insulation. Trapped moisture is a recipe for mold and rot.
- Ventilation check: Make sure your attic is properly ventilated. You should have soffit vents (along the eaves) and ridge vents or gable vents. Good airflow helps prevent heat and moisture buildup. If your soffit vents are blocked by existing insulation, you'll need baffles to keep them clear. This is a common issue in older Mesa homes, especially those built in the 70s and 80s that might have had less stringent building codes, you know?
- Electrical safety: Make sure all recessed lighting is rated for insulation contact (IC-rated). If it's not, you'll need to build a barrier around it or replace it. You don't want insulation touching hot light fixtures.
Most of this prep work is well within the capabilities of a handy homeowner. It's tedious, dirty work, but it doesn't require specialized tools or training beyond a caulk gun and a can of foam.
During the Project: Adding the Insulation
Now, here's where the DIY vs. Pro decision really comes into play. What type of insulation are you considering?
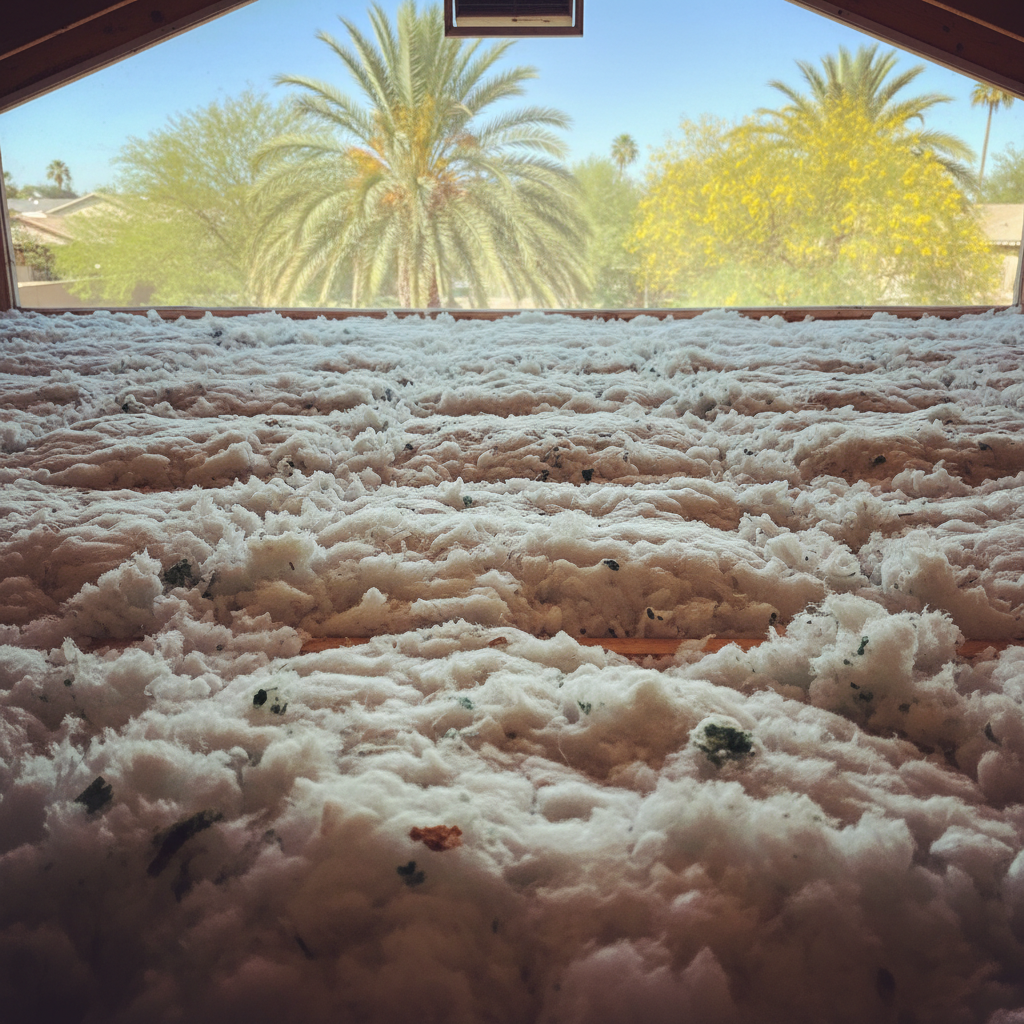
- Blown-in fiberglass or cellulose: You can rent insulation blowers from most big box stores. It's a two-person job – one feeding the machine, one in the attic directing the hose. It's dusty, hot, and you'll need good respiratory protection. It can be hard to get an even depth, especially in tight corners or around obstacles. If you're comfortable with a bit of a workout and don't mind getting filthy, it's doable. Just make sure you're aiming for the right R-value for our climate – we recommend R-38 to R-60 here in Mesa, depending on your current setup.
- Batt insulation: If your attic is easily accessible and has standard joist spacing, laying down batts isn't too tough. You'll need to cut them to fit, wear protective gear, and make sure there are no gaps. The biggest challenge is often getting the batts up into the attic and maneuvered into place, especially if you have a low-pitch roof, which is common in many desert ranch-style homes.
- Spray foam insulation: This is where I'd strongly advise against a DIY approach. Spray foam requires specialized equipment, training, and safety precautions. Mixing the chemicals incorrectly can lead to a host of problems, from off-gassing issues to improper curing, which means it won't perform as expected. Plus, it's incredibly messy if you don't know what you're doing, and it's permanent. This is definitely a job for the pros, like us at Spray Foam Pros of Mesa.
After the Project: What to Look For
Once the insulation is in, whether you did it or we did, you'll want to make sure it's doing its job. The most obvious sign will be a more comfortable home and lower energy bills. You shouldn't feel significant drafts coming from your ceiling, and your AC unit shouldn't be cycling on and off constantly.
Visually, check for even coverage. There shouldn't be any bare spots or areas where the insulation is significantly thinner than others. If you used blown-in, make sure it's not covering your soffit vents. If you used batts, ensure they're snug against each other and not compressed, which reduces their effectiveness.
If you notice any issues, like continued high energy bills or uncomfortable rooms, it's worth getting a professional energy audit. Sometimes, even with new insulation, there might be other issues at play, like leaky ductwork or poor window seals.
So, can you DIY your attic insulation? For basic prep and some types of insulation, absolutely. But for optimal performance, especially with advanced materials like spray foam, or if your attic is particularly challenging, bringing in a professional is usually the smartest move. It saves you time, guarantees the job's done right, and ultimately, saves you more money in the long run.